Connect Google Cloud and verify the catalog
Connect Google Cloud through Cloud on demand and inspect its compute catalog. You will finish with a registered environment and reviewed machine, image, and disk choices. Connecting the account does not provision a VM.
Before you begin
Complete installation checks. Obtain a GCP project and an approved service-account JSON credential from your cloud administrator. The project needs the APIs and access described in Configure Google Cloud. Read that guide's access inventory; it distinguishes source-audited calls from minimum IAM permissions that still require validation in a disposable project.
The service account belongs to Google Cloud. Creating an AkôFlow environment does not create the project, service account, billing configuration or IAM grants.
Using AkôFlow Desktop
1. Open the cloud form
Go to Infrastructure → Environments → Connect environment and select Cloud on demand. Keep Provider set to Google Cloud.
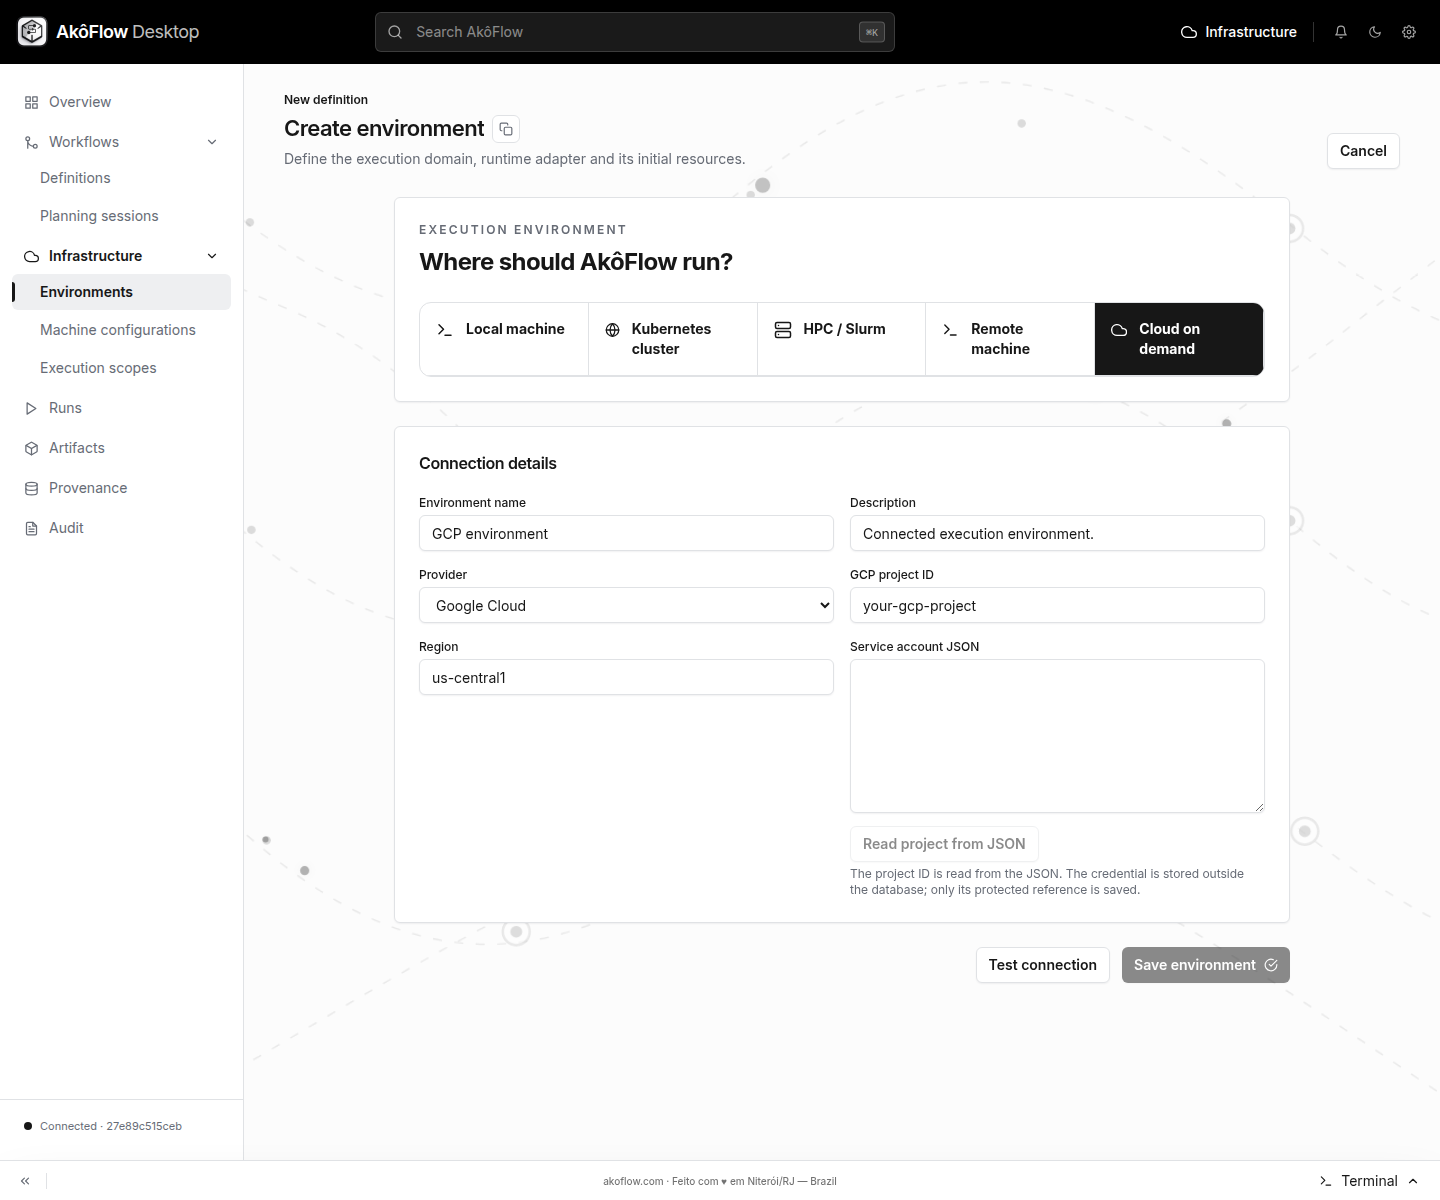
Captured from the Linux application through Chromium DevTools, 2026-09-12. The project is a placeholder and the credential field is empty; this image documents the form, not a successful cloud validation.
2. Supply the project and credential
| Field | Enter |
|---|---|
| Environment name | A recognizable name, such as Research GCP |
| GCP project ID | Your actual project ID, not its display name |
| Region | An allowed region, such as us-central1 |
| Service account JSON | The complete approved JSON credential |
Use Read project from JSON to populate the project ID and check it against the intended project. Use Hide credential when available before sharing your screen. Never include the JSON credential in a workflow or a documentation capture.
3. Test and save
Choose Test connection. The daemon authenticates the service account and checks access to the Compute Engine project without loading the full catalog. A successful result reports that authentication and project access were verified. Review the returned message; saving remains disabled until the test succeeds.
If the test reports a disabled Compute Engine API, use the displayed activation link for the correct project, enable it with an authorized account, and retry. If it times out or returns an access error, correct the cause before saving.
Choose Save environment. The application stores the credential separately, saves only its reference in the environment, and starts catalog discovery in the background. The save action does not wait for machine, image, disk, or price data. Open the saved environment and inspect Cloud capacity. If saving succeeded but refresh failed, reopen the existing environment and refresh there; do not create a duplicate just to retry synchronization.
Using the API
Complete API connection setup. Keep the service-account file outside your repository, with access restricted to your account.
1. Validate the service account
The commands read the credential file directly. Set the path, target project ID,
and region to the values approved for this connection. The target project may
differ from the project that owns the service account if it has the required
access.
Run the following in Bash so pipefail also catches a failed JSON preparation:
set -o pipefail
AKOFLOW_GCP_KEY_FILE='/secure/path/service-account.json'
AKOFLOW_GCP_PROJECT='your-project-id'
AKOFLOW_GCP_REGION='us-central1'

jq --arg project "$AKOFLOW_GCP_PROJECT" --arg region "$AKOFLOW_GCP_REGION" \
  '{provider:"gcp", credential:., projectId:$project, region:$region}' \
  "$AKOFLOW_GCP_KEY_FILE" \
  | curl --fail-with-body \
      -H "Authorization: Bearer $AKOFLOW_API_TOKEN" \
      -H 'Content-Type: application/json' --data-binary @- \
      "$AKOFLOW_API_URL/cloud-credentials/validate/" -o gcp-validation.json || exit 1

jq . gcp-validation.json
jq -e '.valid == true' gcp-validation.json || exit 1
Continue only when validation succeeds. Inspect project and region before
saving. The response does not include machine, image, or disk counts; those
are discovered separately after the environment is saved.
2. Store the credential and prepare the environment
jq '{id:"research-gcp-credential", provider:"gcp", credential:.}' \
  "$AKOFLOW_GCP_KEY_FILE" \
  | curl --fail-with-body \
      -H "Authorization: Bearer $AKOFLOW_API_TOKEN" \
      -H 'Content-Type: application/json' --data-binary @- \
      "$AKOFLOW_API_URL/cloud-credentials/" -o gcp-reference.json || exit 1
The response contains credentialRef, not the original secret. Download
the cloud environment template
and save it as gcp-environment.template.json. Apply your validated settings:
AKOFLOW_GCP_REF=$(jq -er '.credentialRef' gcp-reference.json) || exit 1
jq --arg ref "$AKOFLOW_GCP_REF" \
  --arg project "$AKOFLOW_GCP_PROJECT" \
  --arg region "$AKOFLOW_GCP_REGION" \
  '.connections[0].credentialRef=$ref |
   .connections[0].configuration.projectId=$project |
   .connections[0].configuration.region=$region' \
  gcp-environment.template.json > gcp-environment.json || exit 1

curl --fail-with-body \
  -H "Authorization: Bearer $AKOFLOW_API_TOKEN" \
  -H 'Content-Type: application/json' --data-binary @gcp-environment.json \
  "$AKOFLOW_API_URL/environments/" | jq || exit 1
3. Refresh and inspect the catalog
curl --fail-with-body -X POST \
  -H "Authorization: Bearer $AKOFLOW_API_TOKEN" \
  "$AKOFLOW_API_URL/environments/research-gcp/cloud-catalog/refresh/" | jq

curl --fail-with-body \
  -H "Authorization: Bearer $AKOFLOW_API_TOKEN" \
  "$AKOFLOW_API_URL/environments/research-gcp/cloud-catalog/" | jq

curl --fail-with-body \
  -H "Authorization: Bearer $AKOFLOW_API_TOKEN" \
  "$AKOFLOW_API_URL/environments/research-gcp/" \
  | jq '{environment: .environment.id, version: .version.id,
         connections: [.connections[] | {id, type}]}'
A catalog GET may return 404 before the first successful refresh. Inspect
warnings as well as machines, images and disks: unavailable pricing must not
be interpreted as free compute.
Check the result
| Evidence | Expected result |
|---|---|
| Credential validation | Correct project/region and valid: true |
| Environment | research-gcp exists with a cloud connection |
| Catalog | Machine, image and disk counts are reviewed; any empty category is investigated before provisioning |
| Capacity | No VM is expected merely from connecting the account |
Next, follow Configure cloud capacity to choose a target and deliberately provision a worker. That operation can create billable resources; its guide covers lifecycle and cleanup. Do not treat catalog access as proof that provisioning permissions are complete.
The form and API contracts were checked locally. No live service-account validation, VM provisioning or provider cleanup was performed for these captures. Keep that distinction when recording your own successful connection.